On the very remote chance that someone's worrying themselves sick about where I disappeared to, for the past couple of weeks, I've been working on a "simple" remodel of a bathroom that seems to have spiraled out of control in the typical way that usually happens with most of my remodeling jobs. It started out as a simple job of painting and replacing the flooring, then grew to include some tile work which led to some plumbing work, which all eventually evolved to include a partial gut-job of most of the bathroom, a lot of drywall work, and some fancy-dancy ceiling texturing. Thankfully, I was able to stop the madness before I ended up replacing the plumbing fixtures and all of the lighting.
It's been awhile since I've tackled a job like this, in the past I've remodeled an entire house
almost single-handedly, built a small 500 sq.ft. building
(super-insulated, stained concrete floors, even a bathroom), remodeled a
kitchen, a few bathrooms, and tackled various other smaller projects. But for whatever reason, on this remodeling job it seems like I've somehow lost my remodeling mojo (I still have the skills to do it, I'd just rather be doing something else) and everything seems to be taking forever to finish.
Losing my remodeling mojo might be because I'm just getting older, I'm more of a perfectionist than I used to be, I'm only working a few hours per day on it at a time (still gotta take care of the cows and walk around the pastures every day), or it always took this long to do my projects in the past and I didn't realize it back then. Or, it could be all of the above.
All I know is that I'll be glad when I'm finished with this bathroom project so I can go back to work on more important projects like finally building my portable windbreak, welding the hell out of various stuff that needs the hell welded out of it, cutting down cedars, making bio-char, or fence building.
I'll spare you the boring details of my bathroom remodel, but stay tuned for exciting updates on welding stuff, blocking the wind, and watching grass grow.
Saturday, December 27, 2014
Wednesday, December 10, 2014
Moving Cows, "What The Heck Are You Doing On That Field?", and Pheasants

I typically wean the older calves in mid-October, move the cows to the rented farm where the grass has been growing all summer, and graze the cows until sometime in December. After the first freeze happens, I start supplementing them with my typical 2 lb. of cubes per day routine since dormant native prairie grasses are supposed to be pretty low in protein so supplementing is usually suggested. I'm not entirely convinced about the low protein levels of native warm season grasses, but the cows always seem to gain condition pretty fast.
I originally started feeding cows on dormant pasture back during the drought years of 2011 and 2012 because I didn't have enough hay to make it through the winter, there wasn't any hay to buy if I was inclined to buy hay, and I had no other choice except to haul cattle to another farm and supplement them with cubes for part of the winter. Out of that desperation, I found out that my cows seem to do better under that sort of feeding management.
I've left cows on dormant prairie grasses until late-December before, but since I have plenty of hay, still have about half of my field of sorghum-sudangrass left to graze, and it's always possible that the weather could quickly turn nasty (snow, ice, etc.) in December, I decided to move them back to the farm yesterday.
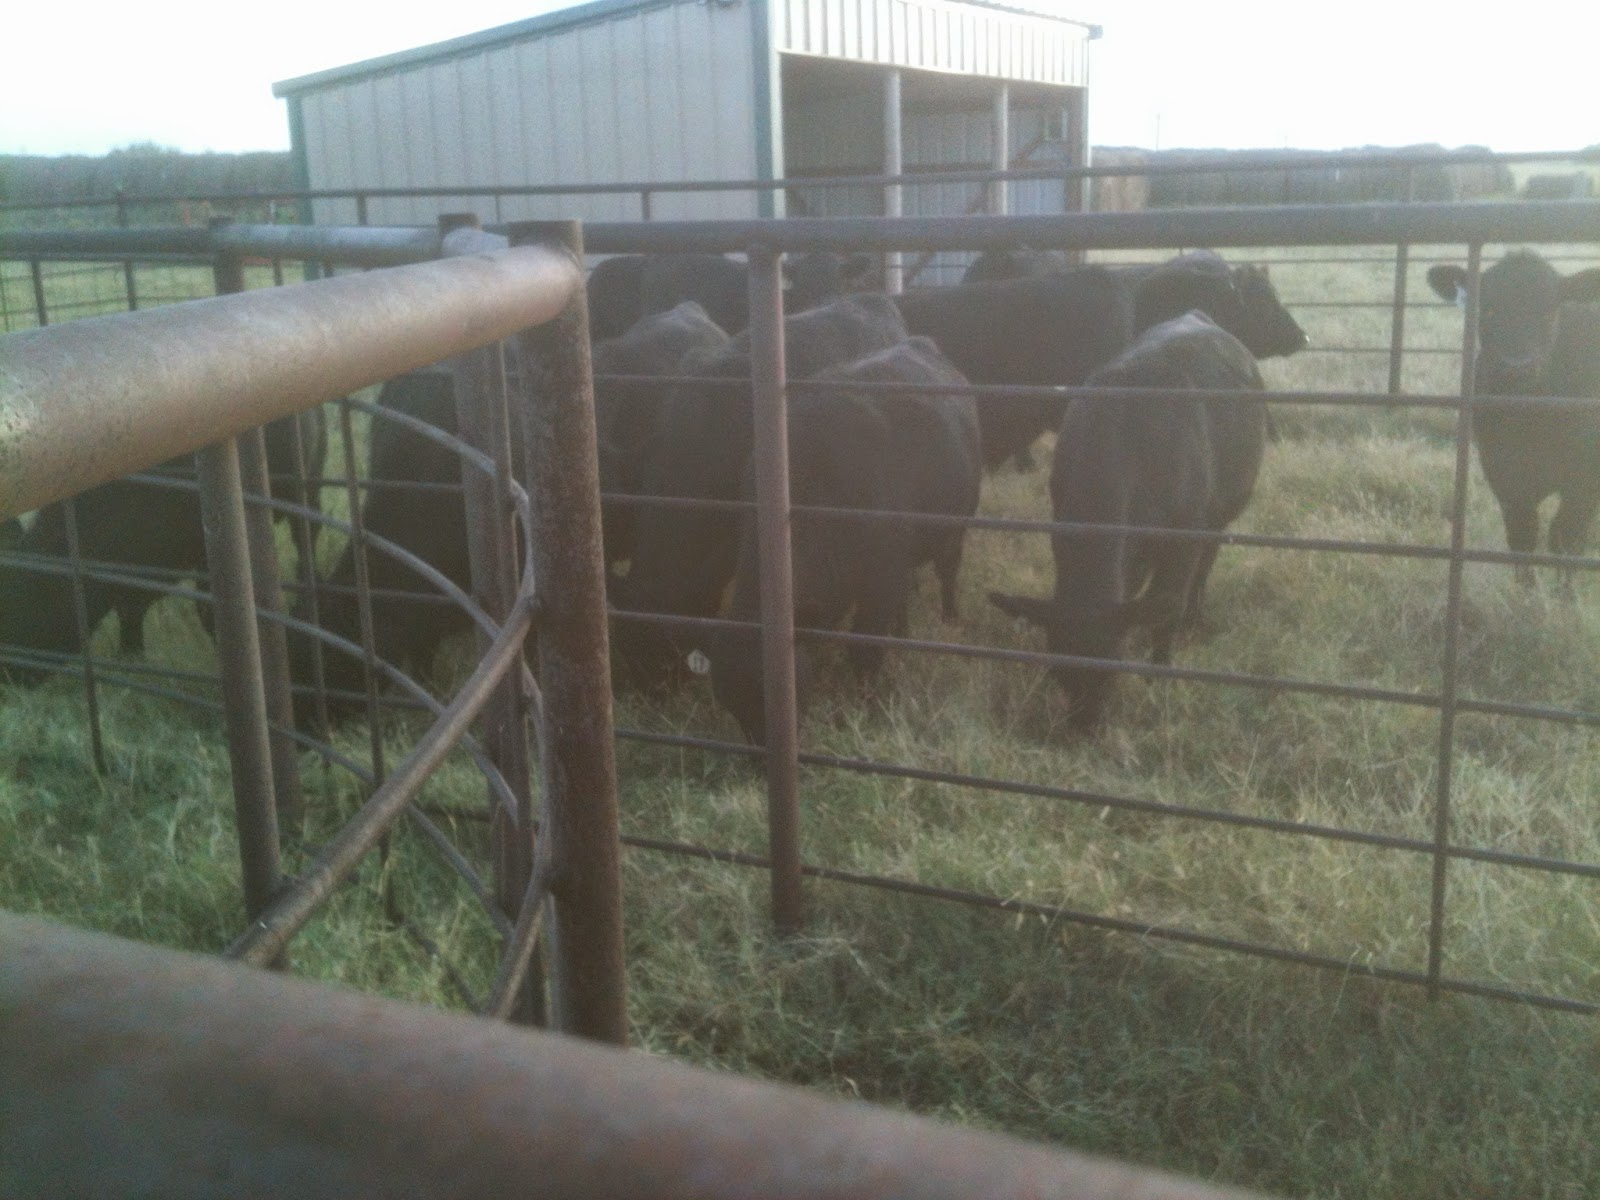
The rented farm doesn't have a great set of loading pens, it's basically a few pens with a long loading chute coming off of one pen, which I sort of modified into a almost-but-not-quite version of a Bud Box. It's slightly above my pay-grade to explain exactly what a Bud Box is and there is a bunch of better info available online, but it's basically a small rectangular pen that's about 12x24 ft next to a chute. The cattle are moved into the box and using low-stress handling techniques they circle around and then go down the chute. When it works right, it works like a dream, but when something goes wrong it can turn into an exhausting cuss-fest of a rodeo, and it can be downright dangerous with wild cattle. Saying all that, I'd still think seriously about building a Bud Box into any set of working pens that I built in the future.
Yesterday, it worked like a dream and anyone watching would probably have been mesmerized with my cow whispering ability to easily sort and load cattle by just moving this way and that. There have been times when it seemed like most of the cows would just flat out refuse to go down that chute and the few that were willing to go down that chute would then refuse to step onto the trailer. It's a lot less work and pretty satisfying when things don't go sideways.
Since I was switching this group of cows from grazing dormant native grasses to grazing sorghum-sudangrass, I put out some hay to help transition them to a different type of forage. Feeding hay before moving to a field of winter-killed sorghum-sudangrass isn't entirely necessary, but it doesn't seem to hurt anything. After they'd filled up with hay, I moved the electric fence to give them access to the ungrazed part of the field, and they all dove into the tall grass and started grazing away. Moving electric fences takes some work, but it's less work than feeding hay not to mention the amount of work involved in cutting, baling, and hauling hay.
The last part of the field that's going to be grazed is next to the road, so it's hard to see the cattle grazing on this field right now. While taking to a neighbor today, he asked what was the deal with this field of dead sorghum-sudangrass, and what the heck was I planning to do with it? I didn't go into all the details of my cover cropping ideas or plans, but told him that I'd divided it up and was grazing it over the winter with the cows instead of feeding hay. I couldn't tell if he was skeptical about my plans and didn't think it would work, or if he was thinking 'that's a great idea, why didn't I think of that?'. Regardless of what he thought, it means something when people are wondering about what you're doing, I can't tell you if it's good or bad but it means something.
I saved the best for last, because this morning I managed to flush a pheasant out of this field of sorghum-sudangrass. Then, later in the morning, I happened to see a pheasant fly across the field and land in the taller ungrazed grass. It was likely the same bird, but I'm counting it as two pheasant sightings. I've seen a few pheasants really close to the farm, but this is the first time I've seen them on the farm in a field that I planted with the thought that it might make decent pheasant habitat.
From this day forward, December 10 will be designated as the official Pheasant Day in commemoration of the appearance of pheasants on the farm in a cover crop field.
After actually seeing pheasants on the farm, I've got an overwhelming hankering to plant some cover crop mix borders next year around some of the wheat fields specifically for the pheasants and quail. Hopefully, if I plant a few strips of pheasant habitat, everyday could be Pheasant Day.
Now, I need to figure out what to plant to attract some elk to the farm because believe it or not, there is an elk hunting season in most of Oklahoma. To my way of thinking, Elk Day celebrations would easily beat Pheasant Day celebrations.
Saturday, December 6, 2014
A Few Thoughts About Grazing Sorghum-Sudangrass


I split this field into four sections (I'm not sure if I'd call them paddocks) and after the cattle had grazed the first quarter for about a week I opened up the second section. Since I was still developing my winter-grazing eye and wasn't sure about how much grazing was still left, I got a little nervous and opened up the second part earlier than I planned, but in hindsight I think I could have waited much longer. Now, I'd just estimate how many bales of hay per acre a field would have made, then I'd simply figure out how many bales of hay I'd feed in a week (factoring in some waste. etc.), and I'd build my paddock big enough to provide a week's worth of feed (or a day, a month, etc.). This field is about 25 acres, it should have made about 3 bales per acre, so it's the equivalent of 75 bales of hay. I usually figure that it takes one 1200 lb. bale of hay to feed a 1200 lb. cow for a month, so I could possibly graze 75 cows for a month or 25 cows for three months if I had no wasted grass (So far, with trampling and waste, it looks like I'll be lucky to get the equivalent of about 50-60 bales?).
I've read accounts that claimed that the protein levels for winter-killed sorghum-sudangrass could be as high as 11%, which is more than enough protein for a dry cow and also kind of hard to believe. Most of the typical prairie hay that I typically feed is supposed to be below 8% protein (I've never had any hay tested, but I really should), so I typically feed about 2 lb. of 20% cubes per day to supplement the hay, and I've also been feeding about 2 lb. of cubes while they are on this field of sorghum-sudangrass.
When I try doing this again, I think I'd add in something like cowpeas, sunn hemp, turnips, or sunflowers (I've been reading some unexpected info about the high-protein levels of sunflowers) to get protein levels high enough so that I could eliminate the cubes completely. The money I'd save by not needing to buy cubes would easily pay for a lot of cover crop seed, plus planting a cover crop mixture would be better at building the soils in my fields. I said it before, but I'll say it again, next year is going to be the year of the cover crop mix, but that's also what I said last year.
This year it also seems like there are more blackbirds (I'm no birdwatcher, so I'm not sure on the exact identity of these birds) around than there usually are in the winter, they're both in the sorghum-sudangrass field and in the pasture next to it. I don't know if the field of sorghum-sudangrass has anything to do with it, but they seem to be doing a great job of breaking up all the cow patties by scratching through them like a huge flock of hyperactive tiny chickens.
Of course, they might also eat a bunch of grain sorghum next year before it's harvested, so I'm not sure if a bunch of blackbirds is good or bad. But, since there isn't really anything that can be done one way or another, my best guess is that they are neither good nor bad, they just are.


Monday, December 1, 2014
Deer Hunting Out of a Box Blind
In Oklahoma, the deer gun season opens on the weekend before Thanksgiving and I've been deer hunting off and on since then. Last year, it turned brutally cold early in the gun season with sleet and snow, which both made it hard to hunt and started me thinking about building some sort of box blind so I could get out of the weather if I wanted to. Then the antlerless deer season in late-December was even more miserable, which made me think even more seriously about building a box blind so I could go deer hunting without getting frostbite or hypothermia.
You would think that building a box blind and then hunting out of it would be a simple matter, but I've always had a mindset about hunting that didn't include things like box blinds, hunting guides, ATVs, etc. I've never really liked gadgets or shortcuts in hunting, and a box blind always seemed like a really big gadget and shortcut.
With all those thoughts in mind, I finally broke down and built a simple box blind last summer (with help from my nephew) using salvaged material from a shed that was being dismantled and since it didn't really cost me anything to build, I was able to halfway convince myself that this wasn't really a gadget or shortcut because it was almost free (I think the final tally was about $10 for some hinges). It's kind of funny how my mind works, ain't it?
There's about a thousand different ways to build a box blind, so going into all the details isn't really that important (although if anyone asks, I'd share more of the details of how I built this box blind and what I'd do differently), but I basically built a simple 4x6 box on skids with shooting windows on three sides and a good watertight metal roof. The roof is high enough inside so that I don't bash my head on the ceiling if I stand up too fast and the window openings are about 40 inches high. If I ever build another one, I'd change a few things like making it 4x8 (so I'd have the crazy option of sleeping in it so I could then tell people that I had a "small hunting cabin in the woods"), I might make the windows openings a little shorter, and I'd try to make it a whole lot lighter so it'd be easier to move around.
After it was built, we loaded it up and put it in a part of the farm that used to be a small wheat field down along a creek. This field is only about 8-9 acres, but it's about 450 yards long, so it's a long, skinny field. It's been about forty years since it's been planted to wheat, but for years I've been thinking about trying to pasture crop some food plot mixtures of wheat, oats, ryegrass, clovers, turnips, etc. in this field (first, I need to get the bulldozer over there to fix the road to the field so I can get the tractor to it). If I can eventually get something green growing in this field during deer season, a box blind might be even more useful and I might even go completely over to the dark-side and build an elevated box blind.
After sitting in the box blind a few times over the last week, it appears that I'm getting closer to official old-man status because I was able to sit a whole lot longer than normal without getting as cold or sore. It's amazing how much easier it is to stay warm when you are sitting in a chair instead of on the ground or up in a treestand.
Now I'm starting to see why box blinds are popular with old men, little kids, and people that are fond of comfortable chairs. Shooting a deer out of a box blind with a rifle isn't the same as shooting a deer on the ground with a bow (which is my favorite way to hunt), but hunting out of a box blind is better than not hunting at all because it's too cold and miserable.
As a bonus, I can always turn this box blind into a chicken house, a pigeon loft, an ice fishing shack, a super-deluxe outhouse, a roadside vegetable stand, or a super tiny house.
You would think that building a box blind and then hunting out of it would be a simple matter, but I've always had a mindset about hunting that didn't include things like box blinds, hunting guides, ATVs, etc. I've never really liked gadgets or shortcuts in hunting, and a box blind always seemed like a really big gadget and shortcut.
With all those thoughts in mind, I finally broke down and built a simple box blind last summer (with help from my nephew) using salvaged material from a shed that was being dismantled and since it didn't really cost me anything to build, I was able to halfway convince myself that this wasn't really a gadget or shortcut because it was almost free (I think the final tally was about $10 for some hinges). It's kind of funny how my mind works, ain't it?
There's about a thousand different ways to build a box blind, so going into all the details isn't really that important (although if anyone asks, I'd share more of the details of how I built this box blind and what I'd do differently), but I basically built a simple 4x6 box on skids with shooting windows on three sides and a good watertight metal roof. The roof is high enough inside so that I don't bash my head on the ceiling if I stand up too fast and the window openings are about 40 inches high. If I ever build another one, I'd change a few things like making it 4x8 (so I'd have the crazy option of sleeping in it so I could then tell people that I had a "small hunting cabin in the woods"), I might make the windows openings a little shorter, and I'd try to make it a whole lot lighter so it'd be easier to move around.
 |
| Tiny hunting cabin |
 |
| Windows opened up and ready for business |
 |
| Looking South |
 |
| Looking East-Northeast? |
 |
| Looking North |
After sitting in the box blind a few times over the last week, it appears that I'm getting closer to official old-man status because I was able to sit a whole lot longer than normal without getting as cold or sore. It's amazing how much easier it is to stay warm when you are sitting in a chair instead of on the ground or up in a treestand.
Now I'm starting to see why box blinds are popular with old men, little kids, and people that are fond of comfortable chairs. Shooting a deer out of a box blind with a rifle isn't the same as shooting a deer on the ground with a bow (which is my favorite way to hunt), but hunting out of a box blind is better than not hunting at all because it's too cold and miserable.
As a bonus, I can always turn this box blind into a chicken house, a pigeon loft, an ice fishing shack, a super-deluxe outhouse, a roadside vegetable stand, or a super tiny house.
Tuesday, November 18, 2014
More Portable Windbreak Thoughts
I've more or less decided how I'm going to build my windbreaks (as always, subject to change) which I'll go ahead and share. I decided to follow the design from the Ranchers.net forum post which I wrote about in my previous post.
I went ahead and built some little models to scale out of some foam board and wire to make it a little easier to show what I'm talking about, and also so I could huff and puff and try to blow them over to test how stable the design actually is. I don't know how accurate my "huffing and puffing trying to blow them over" test is or if it even applies to real world conditions, but it was harder to blow them over than I thought it would be, so I'm satisfied they'll work.
It's easier to look at the photos than it would be to draw and explain my plans, but the relevant measurements are:
-the windbreak (foam board, sheet metal, wood, etc.) part is 8'x24',
-the width of the base needs to be 1.5 times the height of the windbreak for stability, so the legs are about 12' long,
-the lines on the foam board represent the framing that the sheet metal is attached to,
-there is about a one-foot gap at the bottom for enough air flow (it has something to do with snow drifting),
-the pipe at the top is so that a tractor with a bale spike can be used to pick up and move the windbreaks.
-the legs are removable and are simply a 2 3/8 pipe slid into a 2 7/8 sleeve (the Ranchers.net forum post has a picture of the assembly).
Since the windbreak has removable legs and is about 8' tall, I should be able to easily disassemble and load them onto an equipment trailer so that they can be moved longer distances (which is one of my design criteria).


I haven't decided if the windbreaks should be built entirely out of 2 3/8 pipe or a combination of pipe and 3" (or 4") c-channel purlin material (like a steel framed barn). Right now, I'm leaning towards the pipe and purlin combination to make it less top heavy and easier to attach the sheet metal.
The material used to make the windbreak itself also needs to be decided. Some sources recommend something like 2x6 lumber spaced a couple of inches apart to make a porous windbreak which is supposed to have an advantage over a solid wall (try going to the Portable Windbreak Fences publication for more info). Wood seems like it would be heavy, more expensive, and less durable. If I could salvage some treated boards from somewhere, it might be an option.
I've also read about using used billboard tarps (available on eBay for reasonable prices) on a windbreak, which sounds like it would work reasonably well although I'm not sure how long a billboard tarp would last or what it would look like out in a pasture if the printed part of the billboard tarp was still visible.
Solid sheet-metal (the same as on a barn) is another option, which at the moment, is the type of material I think I'd probably use for building a windbreak. Sheet-metal is relatively light weight, pretty durable, and is affordable. Sheet metal should also make it easier to move them on a trailer if I ever decide to. I'm undecided about whether I'd run the sheet-metal horizontally or vertically. The framing would need to be built differently depending on how the sheet metal is installed, so I'll have to do some thinking on what would work better, would be easiest to build, etc..
So far, I think that explaining in detail how I'd build my version of a portable windbreak might possibly be the extra shove I need to build one or two this winter, so stay tuned for the possible, maybe, if-I-ever-get-around-to-it building process (I'm still not making any promises though).
I went ahead and built some little models to scale out of some foam board and wire to make it a little easier to show what I'm talking about, and also so I could huff and puff and try to blow them over to test how stable the design actually is. I don't know how accurate my "huffing and puffing trying to blow them over" test is or if it even applies to real world conditions, but it was harder to blow them over than I thought it would be, so I'm satisfied they'll work.
It's easier to look at the photos than it would be to draw and explain my plans, but the relevant measurements are:
-the windbreak (foam board, sheet metal, wood, etc.) part is 8'x24',
-the width of the base needs to be 1.5 times the height of the windbreak for stability, so the legs are about 12' long,
-the lines on the foam board represent the framing that the sheet metal is attached to,
-there is about a one-foot gap at the bottom for enough air flow (it has something to do with snow drifting),
-the pipe at the top is so that a tractor with a bale spike can be used to pick up and move the windbreaks.
-the legs are removable and are simply a 2 3/8 pipe slid into a 2 7/8 sleeve (the Ranchers.net forum post has a picture of the assembly).
Since the windbreak has removable legs and is about 8' tall, I should be able to easily disassemble and load them onto an equipment trailer so that they can be moved longer distances (which is one of my design criteria).
 |
| Two windbreaks attached together and angled for more wind blocking action |
 |
| Legs need to be 6-feet from the ends so the windbreaks can be angled |
 |
| Three windbreaks attached together for even more stability and wind blocking |
The material used to make the windbreak itself also needs to be decided. Some sources recommend something like 2x6 lumber spaced a couple of inches apart to make a porous windbreak which is supposed to have an advantage over a solid wall (try going to the Portable Windbreak Fences publication for more info). Wood seems like it would be heavy, more expensive, and less durable. If I could salvage some treated boards from somewhere, it might be an option.
I've also read about using used billboard tarps (available on eBay for reasonable prices) on a windbreak, which sounds like it would work reasonably well although I'm not sure how long a billboard tarp would last or what it would look like out in a pasture if the printed part of the billboard tarp was still visible.
Solid sheet-metal (the same as on a barn) is another option, which at the moment, is the type of material I think I'd probably use for building a windbreak. Sheet-metal is relatively light weight, pretty durable, and is affordable. Sheet metal should also make it easier to move them on a trailer if I ever decide to. I'm undecided about whether I'd run the sheet-metal horizontally or vertically. The framing would need to be built differently depending on how the sheet metal is installed, so I'll have to do some thinking on what would work better, would be easiest to build, etc..
So far, I think that explaining in detail how I'd build my version of a portable windbreak might possibly be the extra shove I need to build one or two this winter, so stay tuned for the possible, maybe, if-I-ever-get-around-to-it building process (I'm still not making any promises though).
Monday, November 17, 2014
Apparently Quail Like Sorghum-Sudangrass
Today was the day that I finally put the cattle on my field of sorghum-sudangrass. If it hadn't been for the early cold snap we had last week, I would have put them on sooner, but since I've never liked the combination of cold, biting wind and building electric fences, and it isn't that big of a deal to wait a few days to start grazing it, I decided to wait a few days.
Right after opening the gate, I walked the electric fences to double-check that the deer hadn't knocked them down and almost immediately jumped the biggest covey of quail (20-25 birds) that I've seen in a very long time. I was thinking that quail might be attracted to this sort of winter cover, but it's nice to have my thinking confirmed by actually seeing that many on a cold, snowy day.
If I added some sunflowers, buckwheat, or cowpeas to the sorghum-sudangrass, I wonder how many more quail I could raise? A bird dog would be next to impossible to see in that tall grass, but it would be a heck of a hunt if I had a hundred acres of sorghum-sudangrass full of quail and a good bird dog.
Even more surprising was the number of rabbit tracks I saw in the mowed strip where the electric fence is. One day of snow, extra cold temperatures, and the rabbits were running everywhere. A beagle would have ran himself ragged and gone hoarse in that field.
I planted this field of sorghum-sudangrass to feed my soil and a few cattle, but if it will also feed the quail, rabbits, hawks, coyotes, and hopefully some pheasants in the future then it's well worth the $15/acre it cost to plant.
Right after opening the gate, I walked the electric fences to double-check that the deer hadn't knocked them down and almost immediately jumped the biggest covey of quail (20-25 birds) that I've seen in a very long time. I was thinking that quail might be attracted to this sort of winter cover, but it's nice to have my thinking confirmed by actually seeing that many on a cold, snowy day.
If I added some sunflowers, buckwheat, or cowpeas to the sorghum-sudangrass, I wonder how many more quail I could raise? A bird dog would be next to impossible to see in that tall grass, but it would be a heck of a hunt if I had a hundred acres of sorghum-sudangrass full of quail and a good bird dog.
 |
| Before the cattle have started grazing |
 |
| Rabbit tracks running all over the place |
Sunday, November 16, 2014
Thinking About Windbreaks
About a week ago, the temperature was in the 80's, then the most recent "Polar Vortex", "Polar Invasion", "Arctic Outbreak", or "whatever the heck they've decided to call it" reached Oklahoma, and the temperature dropped into the twenties and thirties. That might be shirt-sleeve weather farther north, but with the wind also blowing 20-30 mph, it's seemed pretty cold to me (especially since the temperature dropped that much almost overnight).
It's been so cold that the ponds have frozen a couple of days and I've already had to chop holes in the ice for the cows (I don't think I've ever had to do that this early in the year before). This morning it started snowing and they're forecasting a low of around 16 degrees tomorrow, which is awfully cold for mid-November in Oklahoma.
All this cold this soon has gotten me to thinking once again about building some sort of windbreak for the cattle.
About four or five years ago, when my calving season started in mid-February, a big storm hit right as the cows were starting to calve. The temperature dropped to well below zero (24 degrees below zero), over a foot of snow fell, and the road to the farm drifted closed for a few days until the county brought in a bulldozer to move the snow. I was lucky that time and didn't lose any calves, although I ended up with a couple that had frostbitten ears and tails. If the storm had hit a week later when more cows were calving, I really would have been in trouble.
After that storm, I moved the calving season to March trying to avoid the worst of winter weather and started thinking about building some sort of windbreak in that pasture. I also built a loafing shed so I'd have somewhere to put any newborn calves if a storm hit during calving season.
I soon found out that calving in March didn't mean that I'd avoid most of the ice and snow winter storms. I also found out that a loafing shed doesn't really help as much as I thought it would with newborn calves, because unless I babysit each and every cow that might be ready to calve, it's impossible to move a calf to the loafing shed quick enough to make a difference in a storm that's bad enough that a calf might need to be in that loafing shed. A loafing shed has a use on the farm, but it doesn't really help in blizzard unless I could somehow put all the cows into it before the storm hit.
Most local pastures have enough trees and protected areas that windbreaks would be an unneeded luxury, but the pasture where I like to winter my cows doesn't have enough trees in the right places to provide enough shelter. Planting more trees is probably the best long-term solution, but for the short-term, building some sort of windbreak might be useful.
Even though I've thought about building a windbreak for a couple of years, I've never got around to actually building anything (mainly because I can't decide exactly what I want to build or if a windbreak would even work). In the process of trying to decide what to build, as a test, I hung a tarp on one side of the working pens to make a 6'x24' windbreak last winter right before one snow storm which did block the wind, but I didn't see any cattle around it at all. I'm not sure if it just wasn't tall enough, it wasn't wide enough, it wasn't in the best location, or it was something else?
Another time right before a snowstorm, I stacked about ten bales of hay in a line next to an already somewhat sheltered area. This idea did work to block the wind, some of the cattle gathered around it, and some calves even bedded down out of the wind next to the bales like they were supposed to. The only problem was that the cows ate just enough of the bales that when I tried to move them after the storm, I had a big mess of falling apart hay bales so I had to just leave them out for the cows to clean up. After they'd eaten part of the hay and wasted a heck of a lot of it, I then found out that it was almost impossible to get all that baling twine cleaned up. Except for when I'd need an emergency shelter, I don't think building a windbreak out of stacked hay or straw would really work for me.
After all that , I've been thinking about building a honest-to-goodness windbreak like they use up in places like Canada. I've seen a few interesting designs online for portable windbreaks that look like they might work that are about 10-12 feet tall and about 20-24 feet long built out of pipe and covered with either 2x6 lumber or sheet-metal. Last year, I got as far as drawing up some rough plans and making out a materials list (which I can't find now) and estimated that it would cost around $400-500 for materials (for all new steel and lumber).
For anyone interested, some of my ideas came for these two links: a forum post on Rancher.net and an agriculture publication from Saskatchewan about Portable Windbreak Fences.
I hoping that thinking out loud about windbreaks on this blog combined with this early snowstorm might help push me enough to start building a windbreak this winter in time for calving season instead of next summer when it's too late. Wish me luck, and if I build one I'll share the building process in the future.
If anyone had any ideas or suggestions to add, feel free to share them.
It's been so cold that the ponds have frozen a couple of days and I've already had to chop holes in the ice for the cows (I don't think I've ever had to do that this early in the year before). This morning it started snowing and they're forecasting a low of around 16 degrees tomorrow, which is awfully cold for mid-November in Oklahoma.
 |
| When it's cold, the wind's blowing, and it's snowing, I'm driving to check the cattle instead of walking |
About four or five years ago, when my calving season started in mid-February, a big storm hit right as the cows were starting to calve. The temperature dropped to well below zero (24 degrees below zero), over a foot of snow fell, and the road to the farm drifted closed for a few days until the county brought in a bulldozer to move the snow. I was lucky that time and didn't lose any calves, although I ended up with a couple that had frostbitten ears and tails. If the storm had hit a week later when more cows were calving, I really would have been in trouble.
After that storm, I moved the calving season to March trying to avoid the worst of winter weather and started thinking about building some sort of windbreak in that pasture. I also built a loafing shed so I'd have somewhere to put any newborn calves if a storm hit during calving season.
I soon found out that calving in March didn't mean that I'd avoid most of the ice and snow winter storms. I also found out that a loafing shed doesn't really help as much as I thought it would with newborn calves, because unless I babysit each and every cow that might be ready to calve, it's impossible to move a calf to the loafing shed quick enough to make a difference in a storm that's bad enough that a calf might need to be in that loafing shed. A loafing shed has a use on the farm, but it doesn't really help in blizzard unless I could somehow put all the cows into it before the storm hit.
Most local pastures have enough trees and protected areas that windbreaks would be an unneeded luxury, but the pasture where I like to winter my cows doesn't have enough trees in the right places to provide enough shelter. Planting more trees is probably the best long-term solution, but for the short-term, building some sort of windbreak might be useful.
Even though I've thought about building a windbreak for a couple of years, I've never got around to actually building anything (mainly because I can't decide exactly what I want to build or if a windbreak would even work). In the process of trying to decide what to build, as a test, I hung a tarp on one side of the working pens to make a 6'x24' windbreak last winter right before one snow storm which did block the wind, but I didn't see any cattle around it at all. I'm not sure if it just wasn't tall enough, it wasn't wide enough, it wasn't in the best location, or it was something else?
Another time right before a snowstorm, I stacked about ten bales of hay in a line next to an already somewhat sheltered area. This idea did work to block the wind, some of the cattle gathered around it, and some calves even bedded down out of the wind next to the bales like they were supposed to. The only problem was that the cows ate just enough of the bales that when I tried to move them after the storm, I had a big mess of falling apart hay bales so I had to just leave them out for the cows to clean up. After they'd eaten part of the hay and wasted a heck of a lot of it, I then found out that it was almost impossible to get all that baling twine cleaned up. Except for when I'd need an emergency shelter, I don't think building a windbreak out of stacked hay or straw would really work for me.
After all that , I've been thinking about building a honest-to-goodness windbreak like they use up in places like Canada. I've seen a few interesting designs online for portable windbreaks that look like they might work that are about 10-12 feet tall and about 20-24 feet long built out of pipe and covered with either 2x6 lumber or sheet-metal. Last year, I got as far as drawing up some rough plans and making out a materials list (which I can't find now) and estimated that it would cost around $400-500 for materials (for all new steel and lumber).
For anyone interested, some of my ideas came for these two links: a forum post on Rancher.net and an agriculture publication from Saskatchewan about Portable Windbreak Fences.
I hoping that thinking out loud about windbreaks on this blog combined with this early snowstorm might help push me enough to start building a windbreak this winter in time for calving season instead of next summer when it's too late. Wish me luck, and if I build one I'll share the building process in the future.
If anyone had any ideas or suggestions to add, feel free to share them.
Friday, November 7, 2014
Grazing Sorghum-Sudangrass over the Winter
It's getting closer to the time when I can start to graze the field of sorghum-sudangrass I planted back on July 22.
Quickly summarizing, by the first of October it had more or less reached maturity, was starting to put out seed heads, and the better parts of the field were about 8 feet tall. We had a killing freeze (27 deg. F) on October 31, which should have killed it, and so it will be safe to graze about 7-10 days later.
With sorghum (and a number of other forages) there is a danger of prussic acid poisoning after a frost or a freeze. After a frost, when the plant isn't completely killed and it regrows, there is still a risk of prussic acid poisoning until the regrowth is around 24" tall. If I had a field that had frost damage, I would play it safe and wait until a killing freeze before I let cattle back into that field. After a freeze, when the plant is completely killed, it is supposed to be safe to graze after 7-10 days, but I usually try to wait at least 14 days to make sure everything is dead (I'm a belt and suspenders kind of guy and try to play it as safe as I can).
Nitrate poisoning from sorghum is an entirely different concern and some people seem to confuse nitrate and prussic acid poisoning so do your homework if you are thinking about grazing or baling any of the sorghum family. Nitrate poisoning usually results from higher applications of nitrogen and/or drought conditions, so I'm not that worried about this field since I didn't apply any nitrogen and we had decent growing conditions this summer.
Prussic acid and nitrate poisoning isn't anything to be taken lightly, so if anyone is reading this and thinking about doing something similar, make double sure that you learn all there is to learn about the subject before you turn your cattle out into a field of grain sorghum, sorghum-sudangrass, or any other similar grass.
Whenever I put cattle out on grain sorghum stubble, I usually just let them have access to the entire field, but I'm going to divide this field of sorghum-sudangrass into at least four divisions for a number of reasons. I'm interested in feeding cattle with this field of sorghum-sudangrass, but I'm also interested in improving the soil in this field. Letting the cattle only have access to part of the field should help ration the forage out a little bit longer and should also stop the cattle from eating the higher quality parts in the first few days and leaving the worst for the rest of the winter. Concentrating the cattle on only part of the field should also result in a more even distribution across the field of manure, urine, and any other cow goodness (saliva, milk, hair) they might also be contributing.
It's tough to eyeball a field and accurately determine exactly how big it is, and it's almost impossible to easily figure out where I need to put my electric fence to fence in a 5 acre area in a field of 8-foot tall sorghum-sudangrass by just looking at it. So I used the website: http://www.acme.com/planimeter/ to try different fence placements on an aerial photo.
After trying about fifty different fence placements, I finally decided to divide it up into four sections (I might subdivide those sections even smaller depending on how the cattle actually graze and trample everything). Before I can build an electric fence through a field with grass taller than my head, I'm going to need to mow some strips across the field. I've read accounts of people just driving an ATV or a tractor across a field to knock down the grass before they build a fence, but I think I'd rather mow it now instead of coming back after I've built my fence across the field and trying to mow it when the grass decides it doesn't want to lay on the ground anymore.
I spent so much time laying out where I wanted to mow these strips that I thought it would be a simple matter to just point the tractor in the general direction that I wanted to go, pick out some sort of landmark, and mow a straight line across the field. But, I found out that it's harder to mow a straight line through 8-foot tall grass than I thought it would be, so I decided to try and follow the curve of a terrace instead. Following a terrace is a lot easier than you would think, since I was on a slope, it was relatively easy to feel by the seat-of-my-pants if I was maintaining that slope as I drove across the field (I would have thought it would be easier to drive a straight line than follow the curve of a terrace).
After mowing those strips, it already "feels" like growing sorghum-sudangrass and grazing it over the winter is going to make a difference in the soil health in this field.
I've been thinking that if I had grazed it back in late-September when it was ready to cut for hay, then let it regrow until it winter-killed, I think it might have worked even better (twice the amount of livestock impact, possibly more total growth, etc.). Another idea is that I should have added something like oats or turnips to the sorghum-sudangrass, (oats will grow if planted in late summer) so that I'd still have something growing after the freeze killed the sorghum-sudangrass.
Now I need to build my electric fences and see how the cows eat sorghum-sudangrass "standing hay".
Quickly summarizing, by the first of October it had more or less reached maturity, was starting to put out seed heads, and the better parts of the field were about 8 feet tall. We had a killing freeze (27 deg. F) on October 31, which should have killed it, and so it will be safe to graze about 7-10 days later.
With sorghum (and a number of other forages) there is a danger of prussic acid poisoning after a frost or a freeze. After a frost, when the plant isn't completely killed and it regrows, there is still a risk of prussic acid poisoning until the regrowth is around 24" tall. If I had a field that had frost damage, I would play it safe and wait until a killing freeze before I let cattle back into that field. After a freeze, when the plant is completely killed, it is supposed to be safe to graze after 7-10 days, but I usually try to wait at least 14 days to make sure everything is dead (I'm a belt and suspenders kind of guy and try to play it as safe as I can).
Nitrate poisoning from sorghum is an entirely different concern and some people seem to confuse nitrate and prussic acid poisoning so do your homework if you are thinking about grazing or baling any of the sorghum family. Nitrate poisoning usually results from higher applications of nitrogen and/or drought conditions, so I'm not that worried about this field since I didn't apply any nitrogen and we had decent growing conditions this summer.
Prussic acid and nitrate poisoning isn't anything to be taken lightly, so if anyone is reading this and thinking about doing something similar, make double sure that you learn all there is to learn about the subject before you turn your cattle out into a field of grain sorghum, sorghum-sudangrass, or any other similar grass.
Whenever I put cattle out on grain sorghum stubble, I usually just let them have access to the entire field, but I'm going to divide this field of sorghum-sudangrass into at least four divisions for a number of reasons. I'm interested in feeding cattle with this field of sorghum-sudangrass, but I'm also interested in improving the soil in this field. Letting the cattle only have access to part of the field should help ration the forage out a little bit longer and should also stop the cattle from eating the higher quality parts in the first few days and leaving the worst for the rest of the winter. Concentrating the cattle on only part of the field should also result in a more even distribution across the field of manure, urine, and any other cow goodness (saliva, milk, hair) they might also be contributing.
It's tough to eyeball a field and accurately determine exactly how big it is, and it's almost impossible to easily figure out where I need to put my electric fence to fence in a 5 acre area in a field of 8-foot tall sorghum-sudangrass by just looking at it. So I used the website: http://www.acme.com/planimeter/ to try different fence placements on an aerial photo.
After trying about fifty different fence placements, I finally decided to divide it up into four sections (I might subdivide those sections even smaller depending on how the cattle actually graze and trample everything). Before I can build an electric fence through a field with grass taller than my head, I'm going to need to mow some strips across the field. I've read accounts of people just driving an ATV or a tractor across a field to knock down the grass before they build a fence, but I think I'd rather mow it now instead of coming back after I've built my fence across the field and trying to mow it when the grass decides it doesn't want to lay on the ground anymore.
 |
| Diving into the field and hoping I'm sort of going in the right direction |
 |
| Looking back at my mowed strip (don't worry, it's supposed to be curved) |
After mowing those strips, it already "feels" like growing sorghum-sudangrass and grazing it over the winter is going to make a difference in the soil health in this field.
I've been thinking that if I had grazed it back in late-September when it was ready to cut for hay, then let it regrow until it winter-killed, I think it might have worked even better (twice the amount of livestock impact, possibly more total growth, etc.). Another idea is that I should have added something like oats or turnips to the sorghum-sudangrass, (oats will grow if planted in late summer) so that I'd still have something growing after the freeze killed the sorghum-sudangrass.
Now I need to build my electric fences and see how the cows eat sorghum-sudangrass "standing hay".
Thursday, November 6, 2014
"Bombproof" Feed Troughs
The farm I rent down the road has some interesting feed troughs that are really just some re-purposed military surplus bomb shipping containers.
The government probably spent a pile of money to buy them, they likely traveled around the world a few times, were sold as surplus for pennies on the dollar, and now they're living out the rest of their lives as almost perfectly designed indestructible cattle feed troughs.
It might be me, but I kind of like stuff like that.
Even though I don't really use feed troughs very often, if I ever found some for sale I'd like to buy some for myself. If I was going into the cattle feed trough building and selling business, I'd think long and hard about using the same sort of design, although I don't know if they'd be as interesting without the back story that military surplus bomb shipping containers would have.
 |
| "Bombproof" Feed Trough |
 |
| Upside-down "Bombproof" Feed Trough |
 |
| Shipping & Storage Container, Bomb Dispenser: XM 468 |
Sunday, November 2, 2014
No-Kill Cropping and Pasture Cropping - Still Trying To Figure It Out, But Getting Close
 |
| Drilling Wheat and Crimson Clover into Existing Perennial Grass Pasture |
I first saw an article about pasture cropping about six years ago and then started experimenting trying to see if I could figure out how to make it work for me and my farm. It's hard to describe to someone that doesn't grow wheat, but it's pretty exciting to me to think that there's a possibility that I could convert my cropland to perennial grass pasture and still plant and harvest a wheat crop from those fields.
Over the years I've read and re-read everything I could find online on the subject, I've watched every online video I could find, and I've even listened to a handful of podcasts (but it's still been almost like pulling teeth to get to this point) . Because of all that content being shared it's been a little bit easier to figure out some of the details, so I thought I might share what I've learned.
I always tell people that I'm experimenting with "pasture cropping", but technically I'm actually closer to "no-kill cropping". But since no-kill sounds so close to no-till, people usually hear it as no-till instead of no-kill, so I started calling it pasture cropping even though it's really no-kill. Calling something by another name is a hard habit to break, so when I say pasture cropping, I usually mean no-kill cropping (I hope that's confusing enough).
Pasture cropping is basically drilling cool season grain crops into warm season perennial grass stands to get the benefits of a grain harvest, grazing during the summer, and some regeneration or improvement of the pasture due to the two different sorts of crops complementing each other. The basic idea is that the cool season grass benefits because their roots are able to follow the roots of the dormant warm season grass to moisture and fertility, and then the warm season perennial grasses are able to benefit from the decaying roots of the cool season annual grasses the next summer.
Typically, a pasture cropped field is fertilized the same as a conventional field, while also possibly having some sort of herbicide applications to control weeds, etc.
No-kill cropping is a similar technique except there isn't any fertilizer or herbicide applied, the crop is just drilled into a dry pasture with as little soil disturbance as possible (hence the name No-Kill). By drilling into dry soil with little disturbance, the planted seeds are able to wait for a rain to germinate and they are able to compete with any weeds since weeds usually need some sort of soil disturbance to germinate. No-Kill is basically a low-input technique, with seed and fuel being the only inputs.
Both pasture cropping and no-kill cropping also have the options of a grain harvest, grazing and grain, or grazing only.
Anybody that's interested in pasture cropping or no-kill cropping would probably be better off going online to find more detailed information at websites like: http://www.pasturecropping.com/
or
http://www.nokillcropping.com/
In my experimenting with no-kill/pasture cropping, I've had mixed results, but I've never had a real failure. When I first started, I used a conventional double-disc drill (IH 5100) and drilled some leftover wheat seed into two areas that I'd baled for hay in the summer, one was a bermudagrass pasture and the other was a native prairie pasture. I felt like a fool pulling that drill around those pastures, and I even had someone stop and ask what the heck I was doing. But, most of that wheat came up, those pastures were nice and green over the winter, and I ended up grazing the native grass pasture (the cows seemed to do great on the combination of dormant grasses and wheat pasture) and baling some bermuda/wheat hay (the cattle loved that hay).
It's hard to prove it, but to my eye it looked like the no-kill cropping had slightly improved those pastures because they grew a little bit differently the next summer (or I could have just been seeing what I wanted to see).
After that first year, I started using a no-till drill which had coulters on the front and double-disc openers. At first, I thought that the coulters would be too aggressive and might tear up the pasture more than I wanted, but I found that the perennial grasses create a dense enough sod that even with coulters, the drill only cuts a small slit that almost disappears with the next rain.
Over my years of experimenting, one year I was able to harvest a grain crop after grazing the pasture in late winter. The yield was pretty low (10-12 bu./acre), but my input cost was only about $10-15/acre for seed and fuel. At the time, wheat was selling for about $7/bu, so I had about a 700% return on investment on that little 10 acre pasture. Plus, I was able to bale about 25 bales of bermudagrass hay in the summer and I was able to graze it over the winter.
I kept experimenting on that 10 acre hay meadow, drilling leftover wheat seed into it in the fall, and since we've been in drought for a few years, I've just grazed it out with the cattle over the winter. Grazing it out doesn't seem like it would be a huge money maker, but after a little calculation, I found that if I spent about $10-15/acre to drill that wheat and grazed it, it would save me about one bale of hay (i.e. 1 acre of really thin wheat pasture replaced 1-1100 lb. of hay). During those drought years, a bale of hay probably cost about $40-50/bale (I'm not sure, because I've never bought hay), so I'll gladly spend $15 to keep from spending $40. Plus, I had all those wheat roots doing their whole organic matter building business underground as a bonus.
This year, I decided to try planting a mixture of wheat and crimson clover (85-90 lb. wheat and 7-8 lb. crimson clover per acre) in my no-kill cropping test area. I'm hoping that I can get the crimson clover to go to seed and I can eventually have a volunteer stand of crimson clover growing in that pasture (hopefully it will also start to spread). If I can get some sort of clover established, I'm thinking that my no-kill cropped wheat yields will start to increase.
On November 1, I drilled this mixture into about 10 acres of a predominately bermudagrass pasture that had been baled once last summer, then grazed right before I drilled the wheat. We had a killing freeze (27 degrees) on October 31, which should make the bermudagrass go into winter dormancy so that it won't compete with the wheat until next April or May, and a good rain is forecast for early next week, so there should be enough moisture to get a decent stand of wheat.
Stay tuned for more exciting updates on this no-kill cropping experiment. If we get a little rain this winter, I might even have some photos of a combine cutting wheat in a pasture.
Thursday, October 23, 2014
Planting Wheat
I finished up planting one field of wheat on Wednesday, (about 75 acres in a day and a half), somehow managed to take a few halfway decent photos with my phone so I thought I'd post them and write a little bit about what I know about growing wheat.
Locally, winter wheat is grown for grazing only, dual purpose (grazing and grain), or grain only.
If someone is planning on grazing out their wheat they'll usually try to plant it a lot earlier (early to mid September) to get more forage in the fall, then they'll graze it until about April or May. I've heard two different schools of thought on the planting rate, one is that the earlier you plant the lower the rate of seed you need (~60 lb. or 1 bushel per acre) since wheat will compensate by tillering more if it's planted earlier. The other claim is that you need to plant an even higher rate of seed (2 to 3 bu./acre) because more seed means more plants which gives you more forage. Most of the fertility (nitrogen and possibly phosphorus) is applied at planting in the fall to help produce more forage.
Wheat grown for grain can be planted much later in the year (up until December 1 if you want to get crop insurance) since to get a decent grain yield, wheat only needs to produce 3-4 tillers before going dormant in the winter. For grain only, about a third of the nitrogen is applied at planting, then it will be topdressed in the spring with the rest of the nitrogen to hopefully produce more grain instead of more straw.
Most of the wheat I'm planting is dual-purpose wheat for both grazing and grain. Dual-purpose wheat is planted and managed somewhere in between grazing-only and grain-only. I try to plant at least 90 lb./acre in mid-October with about half of my nitrogen applied to get some forage in the fall, then I'll topdress the other half of the nitrogen in mid-February (depending on how much moisture we've gotten, etc.).
But, the winters have been so dry or the rain came at the wrong time for the last 4-5 years that I haven't had any decent wheat pasture so I haven't really had any dual-purpose wheat for awhile. It would be nice to be able to graze some wheat pasture, but the price of wheat was high enough in most of those years that for awhile I was thinking that growing wheat for the grain might make more sense. Now, as the price for wheat has went down and cattle prices have went up even more, it might make more sense to graze more of that wheat (although wheat pasture is better suited to grazing stockers than grazing cows).
I switched to no-till about four years ago, so I was able to no-till my wheat into some relatively weed-free crabgrass stubble (much better than my tillage days when the dust would be blowing while I was trying to plant my wheat). I really like drilling wheat into crabgrass stubble and the way it makes a nice layer of mulch after the coulters slice through it (it could pour down rain right now and I wouldn't have much erosion).
When people think about wheat fields, they probably imagine big flat fields of wheat (I assume), but all the fields I farm are far from flat and have terraces running around the contours. It's hard to fully capture in a photo, but I've always liked the look of the patterns of the curves of the terraces running across the field. The photos I'm posting show a little bit of that "look", but you might need to see it in person to understand what I'm talking about.
As a reference, at it's steepest part, this field drops about 45-50 feet in around 900 feet which you can almost see in some of the photos, and the horizon in all the photos is level, which might help you imagine the slope of the terraces.
 |
| Going south, drilling wheat along the back of the steepest terrace |
 |
| Heading north, drilling wheat along the back of the same steep terrace |
 |
| Going around the hill, following a terrace near the top of the hill, sorghum-sudangrass in the background |
 |
| Finishing the field at the top of the hill, just in time for the rain |
Sunday, October 19, 2014
Hauling Calves to the Stock Yards
Today was the day to haul some calves to the stockyards. The weekly stocker and feeder sales are on Mondays, but I (and a whole lot of other people) like to haul them to the stockyards on Sunday so they can settle down a little, hopefully fill up overnight on some water and feed, etc. I've heard different opinions about whether that way of thinking is right (some say to haul them on the morning of the sale because they aren't going to eat anything while they're waiting overnight anyway) but my gut tells me that it's better to haul them on the day before the sale, plus the traffic on a Monday morning in Oklahoma City would be a nightmare to deal with while pulling a stock trailer.
I wanted to haul two loads today, so I got up a little earlier and made sure to eat a big breakfast because even if everything went smoothly, I'd be looking at eating a late lunch. If everything went sideways, it would be even later in the day before I could get something to eat, and a growling stomach doesn't help my mood at all when everything seems to be going wrong.
For a change, everything went just the way it should go, the calves all walked right into the pens without any trouble, I was able to sort the heifers from the steers about as fast as I've ever been able to do it, and the steers all loaded onto the trailer without a fight. An hour later, I was unloading them at the Oklahoma National Stock Yards (the World's Largest Stocker and Feeder Cattle Market according the big sign when you drive in). Two hours later, I was back at the stockyards unloading the heifers.
I might just be me, but I always feel a sense of relief after I've unloaded cattle at the stockyards. I'm always a little apprehensive when I'm weaning them, then I'm even more apprehensive when I'm hauling a trailer-full of calves down the highway worrying about every little thing that could go wrong from a flat tire to a back gate coming open on the trailer to a calf going down in the trailer to a car accident. (I've never really had any problems, so I'm not sure why I'm that way). But as soon as the last calf walks off the trailer, I stop worrying about everything.
I just need to go home, maybe take an afternoon nap, and wait until tomorrow to see how the market was. With the record cattle prices we've been seeing lately, I'm betting I'll see the highest prices I've ever gotten for any of my cattle and I also wouldn't be surprised if those record prices start to disappear next year. For all I know, ten or twenty years from now, I might be talking about the unbelievable prices I got back in 2014. It would be great if I'm wrong and the cattle market stays up for a while longer.
 |
| Steers waiting to be loaded |
 |
| Heifers waiting to be loaded |
 |
| Same steers as above |
Wednesday, October 15, 2014
Weaning Calves and Building an Electric Fence - the Rich Way
I weaned some calves today and when I wean calves I put them into the weaning pen (Hey! I wonder if that's why it's always been called the weaning pen?). The weaning pen is just a 2 acre area next to the working pens that's fenced with woven-wire fence (so just-weaned calves have to really work at it to get out).
Supposedly, it's possible to fence-line wean calves by separating the cows and calves with something like a woven-wire or electric fence so that they can still see each each other, touch noses, etc. which lowers the stress levels of both cow and calf, but the calf can't nurse anymore. In the past, I've been able to wean my calves doing just that, using the woven-wire fence around the weaning pen as the fence part in the fence-line weaning process. But it can be a hit-or-miss process in some years, when the calves try to crawl through gates, or the cows decide to bawl at the calves which causes the calves to start bawling, etc. So a few years ago, I just started building an electric fence about two-hundred feet away from the weaning pen to keep the cows a little bit farther away which seems to be a little bit less stressful on the cows, calves, and me.
Since my temporary electric fences are built a little bit differently than most of the typical electric fences I see being built online and in books, and at times I get some of my best ideas after seeing how other people do things, I thought it might give other people some ideas of their own if I showed how I build electric fences the Rich way.
It's not a complicated process to build an electric fence, so most of the info is in these photos (click on them to get a closer look).
When I build a temporary or semi-permanent fence I usually use simple rebar posts that I've modified to be step-in rebar posts. For whatever reason (probably due to the type of clay soil around here) the ground can be hard to get something like a normal step-in post (either the plastic ones or the pigtail type) into the ground, so I've always used rebar posts (the 4-ft. kind with the plate). Once those rebar posts are pounded into the ground, they can also be a bear to get back out of the ground whenever it comes time to take the fence down a few days, weeks, or months later.
A few years ago, I took some of those rebar posts, knocked off the plates that were still on some of the posts (they always seem to fall off or get left in the ground when you pull them), and welded a step made out of a 3" piece of rebar on each one of them.
After welding that little step onto the posts, now I can just grab a handful of posts and install them about as fast as I can walk. Compared to carrying a hammer to pound in the posts, setting down all the posts you're carrying to pound that post, then picking up all the posts, etc., it's a breeze to just step-in all the posts as you walk along. When it comes time to take down the fence, it's easy to grab that welded-on step and turn the post back and forth a few times to loosen it, then use the step as a handle to pull the post.
After I put in my posts, I install the wire. I've always used 14 ga. steel wire for temporary/semi-permanent electric fences like this instead of the typical polywire usually advocated by most people. I've usually used steel wire because my thoughts are that the wind is always blowing here and polywire blowing back and forth in the wind might wear through the filaments in the polywire pretty quick (I'm not sure if that's true, but that's my theory). I also sometimes run longer (up to 2000 ft.) electric fences across wheat fields, and a 14 ga. steel wire is easier to keep hot over a distance that long compared to polywire. I also already had a bunch of 14 ga. steel wire before I had ever even heard of polywire, which is one of the main reasons I use wire instead of polywire.
I store all my wire on some cheap electric cord reels (they cost about $4 each?). As long as I don't overload them with too much wire, they aren't overly heavy, I can tie one end to an insulator, then just start walking and the wire will roll off of the reel while still staying reasonably tight.
I used to use steel t-posts with various insulators tied onto them as both my corner posts and gate posts, but now I pound in a t-post and slip a 4-foot chunk of 2" PVC over it to use as my corner posts and gate posts. With that PVC, insulators aren't needed at all, so when I reach a corner I pull the wire tight, wrap it around the PVC a couple of times and start walking to the next post. The PVC is loose on the t-post, so as I pull on the wire, the PVC will roll and put a little bit of tension on the wire. When I reach a gate post, I wrap it a couple of times around the PVC, wrap it around the wire itself so it keeps tight whenever I open the gate, pull it across the gate opening, and tie on my insulated gate handle (I hope that's halfway understandable).
Most of my permanent interior electric fences are built with some 4-foot t-posts that I've managed to salvage out of broken and bent t-posts that I simple cut off to 4-foot from various times I've rebuilt fences from around the farm. Since I usually only need a single hot wire about 32" high, a 4-foot t-post is the perfect length. Whenever I want to drop a temporary fence off of one of my permanent electric fences, I usually make a simple gate loop by wrapping some wire on either side of an insulator on one of these t-posts.
Like I said, building electric fence isn't rocket surgery, but the easier and quicker it is to build electric fences, the better it is. Any questions, suggestions, criticisms, or ideas about building electric fences?
Supposedly, it's possible to fence-line wean calves by separating the cows and calves with something like a woven-wire or electric fence so that they can still see each each other, touch noses, etc. which lowers the stress levels of both cow and calf, but the calf can't nurse anymore. In the past, I've been able to wean my calves doing just that, using the woven-wire fence around the weaning pen as the fence part in the fence-line weaning process. But it can be a hit-or-miss process in some years, when the calves try to crawl through gates, or the cows decide to bawl at the calves which causes the calves to start bawling, etc. So a few years ago, I just started building an electric fence about two-hundred feet away from the weaning pen to keep the cows a little bit farther away which seems to be a little bit less stressful on the cows, calves, and me.
 |
| Weaned calves in the weaning pen |
It's not a complicated process to build an electric fence, so most of the info is in these photos (click on them to get a closer look).
When I build a temporary or semi-permanent fence I usually use simple rebar posts that I've modified to be step-in rebar posts. For whatever reason (probably due to the type of clay soil around here) the ground can be hard to get something like a normal step-in post (either the plastic ones or the pigtail type) into the ground, so I've always used rebar posts (the 4-ft. kind with the plate). Once those rebar posts are pounded into the ground, they can also be a bear to get back out of the ground whenever it comes time to take the fence down a few days, weeks, or months later.
A few years ago, I took some of those rebar posts, knocked off the plates that were still on some of the posts (they always seem to fall off or get left in the ground when you pull them), and welded a step made out of a 3" piece of rebar on each one of them.
 |
| Modified step-in rebar post next to an original post, make sure the fence is turned off if you ever ask your posts to pose for a photo while they're leaning on the fence |
After I put in my posts, I install the wire. I've always used 14 ga. steel wire for temporary/semi-permanent electric fences like this instead of the typical polywire usually advocated by most people. I've usually used steel wire because my thoughts are that the wind is always blowing here and polywire blowing back and forth in the wind might wear through the filaments in the polywire pretty quick (I'm not sure if that's true, but that's my theory). I also sometimes run longer (up to 2000 ft.) electric fences across wheat fields, and a 14 ga. steel wire is easier to keep hot over a distance that long compared to polywire. I also already had a bunch of 14 ga. steel wire before I had ever even heard of polywire, which is one of the main reasons I use wire instead of polywire.
I store all my wire on some cheap electric cord reels (they cost about $4 each?). As long as I don't overload them with too much wire, they aren't overly heavy, I can tie one end to an insulator, then just start walking and the wire will roll off of the reel while still staying reasonably tight.
 |
| Tied off insulator (ignore those weeds) |
 |
| Cheap electric cord reel repurposed as an electric fence wire reel |
 |
| T-post with 2" PVC - corner post and/or gate post |
 |
| Gate opening |
 |
| Permanent electric fence with a gate loop on the wire |
Like I said, building electric fence isn't rocket surgery, but the easier and quicker it is to build electric fences, the better it is. Any questions, suggestions, criticisms, or ideas about building electric fences?
Subscribe to:
Posts (Atom)