Wednesday, March 26, 2014

Random Pictures of the Cattle

I've been meaning to get a few pictures of some of the cattle, but for some reason it's a little difficult to do that if you don't put the camera in your pocket and/or also forget to put new batteries in it when you finally  remember to put it in your pocket.

 So, I decided to take some pictures with my phone and even though the quality might be a little low, you can still tell that, "By golly, that Rich guy actually does have some cattle!"


  One of the bulls, watch out for him.

Two of the bulls, make double sure you watch out for both of them.  You'd be surprised how hard it is to get two bulls to "pose" for the camera at the same time.  When one is standing almost right for a picture, the other one decides he needs to throw some dirt on his back before his picture is snapped, then the other one decides that he ain't gonna let that other stinking bull get all prettied up for the camera like that so he has to throw some dirt on his back to show him up.  So, I end up with pictures of at least one of the bulls throwing dirt on his back.


Same two bulls, with a pond in the background (Hey, wait a minute, why isn't there any dirt being thrown around?!?). That pond almost looks huge in the picture, but it's only about an acre and a half in size.  Until some beavers showed up and did their typical vandalism job there used to be some trees scattered around that pond. 

It might be hard to tell, but those are some of the cows and a handful of calves way over there (Boy, the sky looks clearer and bluer than I remember).  

It's right in the middle of calving, and my typical day is putting out some hay for the cattle, checking for any new calves, then catching, tagging, and banding the ones that are a couple of days old.  I'd include some pictures of that, but it's a little hard to juggle a camera while holding down a calf. 

Sunday, March 23, 2014

Boring Pictures of Growing Wheat

The wheat came out of dormancy a couple of weeks ago. I usually also start agonizing and worrying about what sort of harvest I'm going to get about this time because you have to get enough rain to get it growing, but not too much rain, it has to rain at the right time to get a good grain fill, it has to stop raining before harvest,  there might be a late freeze that hammers the yield, etc. (they say that you have about 6 crop failures every year when you plant wheat).

So, I decided to start taking some pictures at different times between breaking dormancy and harvest so that I can compare how the wheat looks each year.  As a bonus, I can also start to show more of my little piece of the world to whoever happens to be reading this blog. 

I put some stakes out there as a landmark to make it easier to gauge the height of the wheat as it starts to grow. If you look close, or if I had been able to take a closer picture before the camera ran out of battery life, you might be able to see the orange strips I painted on the stakes (each strip is 6") to help measure the height.  

The first picture is looking across the field closest to the barn, it's not the best part of the field, but it's close and easy to take pictures from this spot.  I no-tilled this wheat into some crabgrass stubble in late October, and it was fertilized with about 90 lb. of nitrogen.

Wheat Field 23 March 2014
I first saw an article about pasture cropping about six years ago and started experimenting with the method a few years ago.  Pasture cropping is basically drilling cool season grain crops into warm season perennial grass stands to get the benefits of a grain harvest, grazing during the summer, and some regeneration or improvement of the pasture due to the two different sorts of crops complementing each other.   Typically, a pasture cropped field is fertilized the same as a conventional field, while also having some sort of herbicide applications to control weeds, etc.

No-kill cropping is a similar technique except there isn't any fertilizer or herbicide applied, the crop is just drilled into the pasture in hopes of more winter grazing possibilities or a grain harvest is all the stars somehow manage to line up.

 Anybody that's actually interested in pasture cropping or no-kill cropping would probably be better off going online to find more detailed information at a website like:  http://www.pasturecropping.com/


In my experimenting with pasture cropping, I've had mixed results, but I've never had a real failure. 

I drilled wheat in a number of places in pastures this fall to experiment a little more, and this picture is of a the weaning pen that is mostly Bermuda grass, it was grazed over the summer, mowed to control weeds (I'm not convinced that worked), then it had some weaned calves on it for a couple of weeks before I drilled the wheat.  It had no fertilizer or herbicide applied, so it might technically be more similar to no-kill cropping than pasture cropping.   


Weaning Pen 23 March 2014
It's hard to tell from the angle of the pictures, but at this point I've ended up with almost as good of a stand of wheat in the weaning pen as the fields with "normal" wheat.  If I can get a grain harvest from this pasture, my only expense will be about $10/acre for seed and the cost of fuel for the tractor.  Even a much lower grain yield than a conventional field could mean a higher profit, since my input costs are so low.

It's hard to describe to someone that doesn't grow wheat, but it's pretty exciting to me to think that there's a possibility that I could convert my cropland to perennial grass pasture and still plant and harvest a wheat crop from those fields.  I'm getting better results the more I experiment, so I'm hoping these pictures might help me figure out something I haven't figured out yet.


Since I'm having trouble with my camera, I going to include some pictures I took with my phone to see if the quality is good enough to ditch my camera and just use my phone for taking pictures.  Let me know what you think about the picture quality.

Wheat Field - 23 March 2014
Weaning Pen - 23 March 2014

Friday, March 21, 2014

Terra Preta - Links to More Info and Interesting Stuff

There is a bunch of information about Terra Preta online, but here's a short list of a few sites that I think summarize most of the information into an quick and easy to understand form.

You can find The Secret of Eldorado, which is the documentary that I originally watched that first got me interested in biochar and terra preta at: 

https://www.youtube.com/watch?v=qqp_H95wjPE

There isn't much technical information about terra preta besides the fact that it is typically rich in biochar and pottery shards, and seems to be present in multiple areas of the Amazonian basin.  But, watching this documentary will give you enough of a background on the story to bore anyone that will listen with the relationship between conquistadors, charcoal, and that barrel you have been cutting and pounding on.

Living Web Farms has a bunch of different workshops on different subjects including a Biochar Workshop you can watch at:  http://www.livingwebfarms.org/#/biochar-workshop/4581248499

There are a total of five different videos in the Biochar series, so you might want to watch all of them.  There is a lot of different information, such as a slightly more involved version of a backyard retort to make biochar, a larger commercial version of a retort, how biochar works, etc. 

There's a description of a SARE project dealing with some test plots and different TLUDs at:  http://www.dyarrow.org/KAW/BiocharontheFarm.htm

One of the interesting details learned from these test plots is that applying as little as 500 lb. of  biochar per acre can start to give desirable results.

Besides all that, I've been applying about half of a wheel barrow full of biochar at a time to an area that's about 100 square feet (I believe that comes out to be about 5 tons/acre).   Over the last 8-10 years, I've covered the entire garden with bio char at a cumulative rate that's somewhere around 50-100 tons/acre. 

When I first started, I made sure to "charge" that biochar with manure, compost, or even fertilizer.    Now that my soil fertility has risen, I think I can get away with just applying the biochar to the garden (or I can start building another garden instead of applying more biochar where it really isn't needed anymore).  

I haven't done any side-by-side comparisons to verify the the biochar is actually doing everything that I'm claiming it does, but the last soil test I had done on the garden showed I had a pH level of just over 7, the nitrogen, phosphorus, and potassium levels were at relatively high levels, calcium levels were high, and the water infiltration rates seem to have gone way up since I started applying biochar.  I don't believe I would have those sort of soil test results from just applying manure, compost, or fertilizer.

Because of my experiences, I'm convinced that applying biochar works.

Thursday, March 20, 2014

Terra Preta - Finished Bio-Char and Applying it to the Garden

At this point, it's been a day or two since I've made bio char in the TLUD,  I usually let the bio char sit in the barrel for at least a day to make double sure it has cooled down.  There is supposedly a remote chance that it can reignite if you take the lid off while it's still warm, although I've found that it's usually cool enough after it's sat overnight.

On this run, when I took the lid off, the bag that I used to start the fire had turned to carbonized paper.  If you look close, you can sort of see that the part that had been burning before putting on the lid has turned to ash and is gone, but the rest of the bag is still there and you can even read what was printed on the bag, but soon after I grabbed it with my meaty fist (my hand doesn't seem to take good pictures)  it crumbled into small pieces of bio char.
A chunk of wood was almost the same way, before I picked it up, it was an intact piece of charred wood, but it easily crumbles and has no ash residue.


This time I ended up with about a third of a barrel of bio char from a loosely filled barrel of maple limbs that were about 12-15" long.  When I've used short (4-6") pieces of cedar, I've been able to pack the material into the barrel a little tighter (I still don't worry excessively about getting it 'just right') and I'll end up with more bio char when I'm done.
After you've made your bio char, it's time to turn it into the makings of terra preta.  I usually do that by cleaning out the stock trailer after hauling some cattle (if you don't happen to have a stock trailer that needs cleaning out, you'll have to figure out something else, like using compost or cleaning out your chicken house).


I usually start by throwing a bucket of stock trailer cleanings into a wheelbarrow, then throw in a bucket of bio char, chop it up and mix it together a little with the shovel, then another bucket of manure and a bucket of bio char, etc. until the wheelbarrow is full.  


Spray a little water once in a while to help "charge" the bio char with the beneficial bacteria and microbes in the manure.    If you are really daring and also of the scientific mind, try leaning down close to the wheelbarrow and taking a good whiff, and you should find out that the bio char has already started  to absorb all the aroma from the manure, compost, etc.  That aroma absorption effect is a simplified explanation for how the bio char works to create your terra preta.  All the little microscopic pores in the bio char absorb and release micro and macro nutrients, microbes, etc. and release them to the plants. 


When I spread my bio char mixture in the garden, I'll cover about 100 square feet with an overflowing wheelbarrow.  When I first spread it , it almost looks like I have turned the the entire area black. But as soon as I run the tiller over it, the "OMG, I've ruined this garden forever" black color is toned down, and I end up with a nice dark looking soil with scattered chunks of bio char on the surface.  Those chunks of bio char will start to crumble and be incorporated with moisture, plant growth, and tilling (I tend to think that those chunks laying on the surface might be absorbing Nitrogen and Phosphorus from the air).      


I tilled this before replacing the worn out tines on the tiller, so if your tiller isn't as worn out as mine, you'll get an even better result.

Next time, I'll try to gather up some of the links I've found that have helped me figure out some of this stuff that I think I know about Terra Preta and TLUDs.

Wednesday, March 19, 2014

Terra Preta - Actually Burning Something in the TLUD

There's not much point in building a TLUD unless you actually use it to make biochar, so I'm going to do a quick rundown of the process. 

If you search online for information about TLUDs and making biochar, you'll find all kinds of people saying that you have to carefully pack the material in the barrel to get the most efficient result.  Since I'm not in the business of  'obsessive-compulsive biochar manufacturing', I don't see the need for being that finicky, so I tend to just throw some smaller pieces in the bottom third or so (pack it down a little with a sledge hammer or ax if you have any finicky tendencies).  With the small pieces on the bottom, I think that the process goes a little quicker because the heat from the top will burn through the smaller pieces a little quicker at the end.

After filling the bottom part,  I just fill up the rest of the barrel with a good mix of whatever material I'm using on that day.  


Once the barrel is a little bit below being more or less full, I throw in a couple of empty feed bags (if you don't have any empty feed bags laying around, you'll have to figure out something else, a decent sized pile of dry straw or grass works great).  Throw some nice dry, small kindling type of sticks on top of the bags and you're almost ready to fire it up.


Usually it's a simple matter of  striking a match and setting the bag on fire to get the process started, the draft from the fire seems to start pulling air in from the bottom pretty quick.


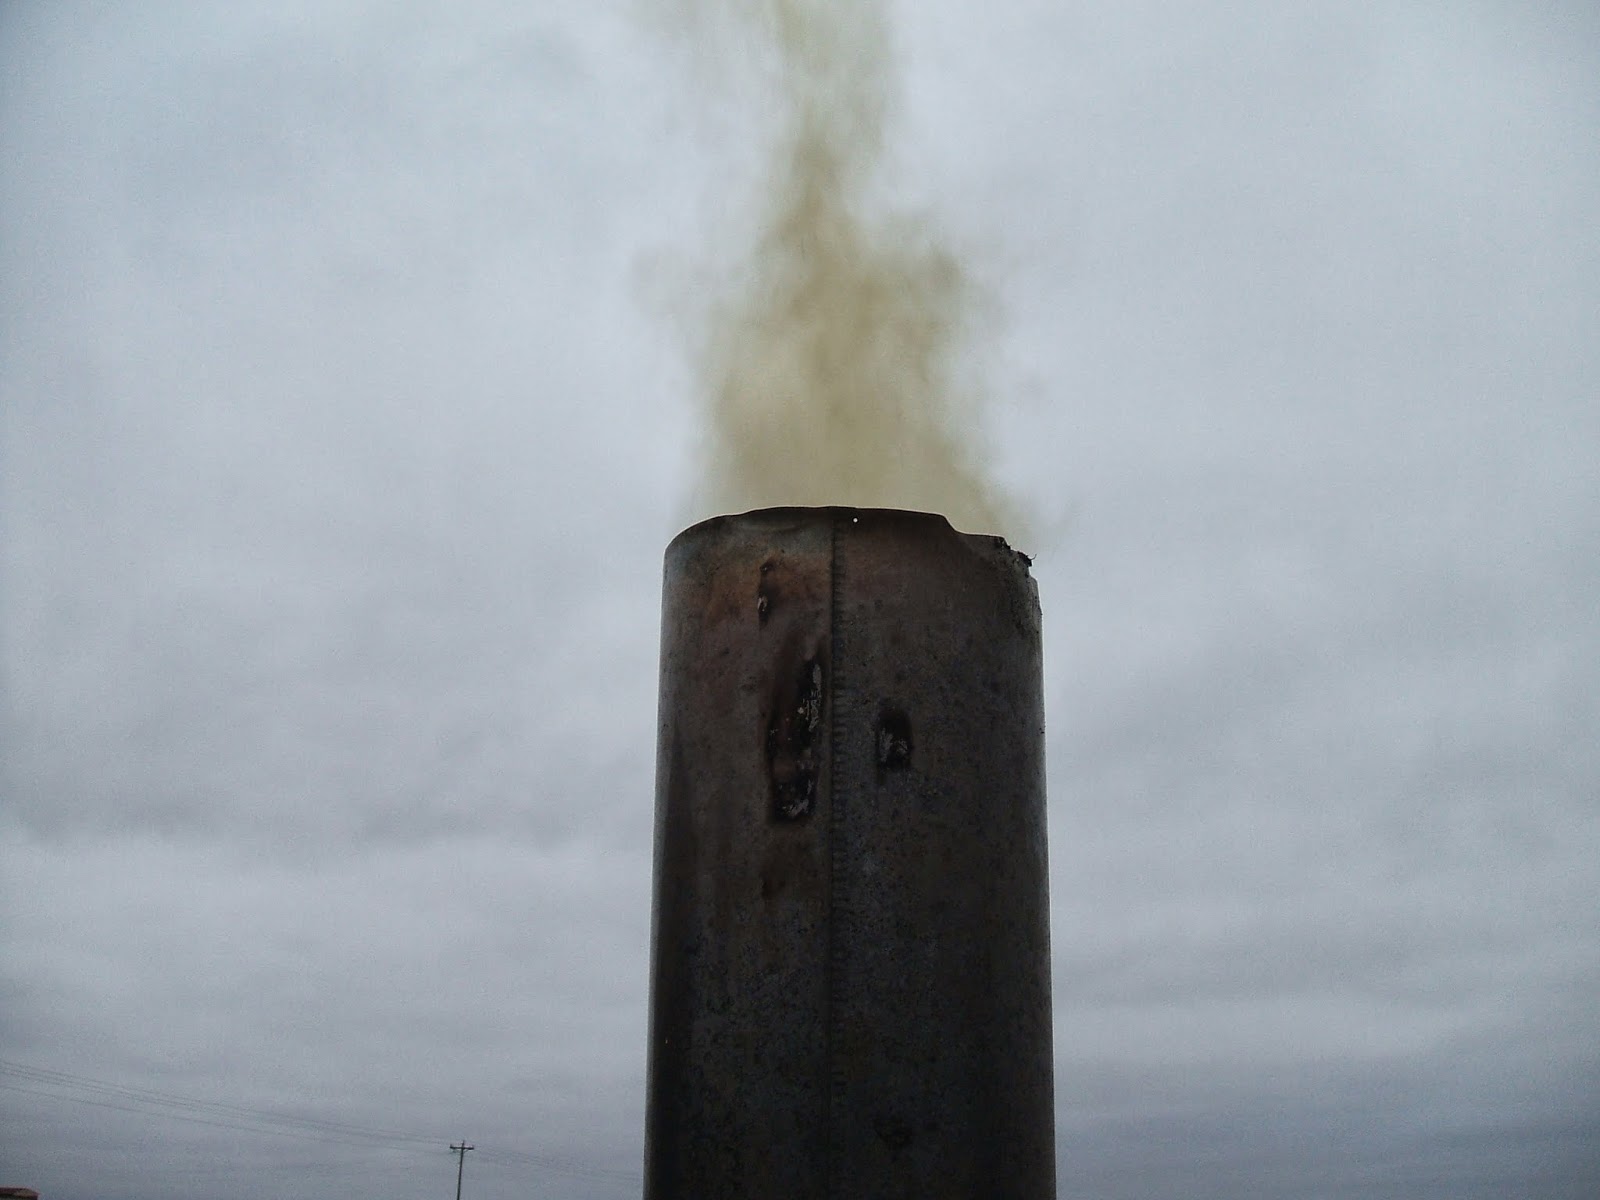
Once the kindling on top of the bag starts to burn, the chimney goes on the barrel and the flames should start intensifying because the heat will cause gases to start volatilizing out of the wood and the flames from those burning gases will start traveling up the chimney, and in a few minutes should be coming out of the top of the chimney.

Here you can see the sticks I put the barrel on (bricks and 2x4's also work).  If you use sticks or 2x4's, they'll start to burn when the fire has burned it's way to the bottom of the barrel, letting you know it's time to put the lid on and cover up the bottom of the barrel with dirt to smother the fire.


If you look real close at this picture you can see the fire through a hole in the chimney, at this point there is almost a roar to the fire (it's hard to imagine until you actually hear it).

That simple little hole is an important part of the whole TLUD, it's designed to let me stick one of the tines from a pitchfork into it so I can maneuver the chimney off and on the barrel without having it crash to the ground or burn my hands.  The concrete blocks are on there because the wind was blowing like a hurricane on this day and the chimney was rocking back and forth in the wind (I wouldn't usually burn it when it was that windy but it had drizzled rain all night and everything was soaking wet).


It's harder than you think to catch an elusive flame poking it's head out of the top of a chimney, and it looks smokier than it really is in this picture, but that's the best picture I could get.


About an hour into the process when  the sticks under the barrel have started burning, it's time to remove the chimney, put the top on, throw a couple of concrete blocks on the lid to keep it tight, spray the outside of the barrel down with water to cool everything down a little, and cover up the bottom of the barrel with enough dirt to smother the fire. 


That's basically it, the next day you can dump out your biochar and start the next batch of biochar. 

Next time, I'll show some of the finished biochar, and give you an idea of what I do with it.

Tuesday, March 18, 2014

Terra Preta

I've been experimenting with making my own version of Terra Preta ever since I first saw the BBC documentary The Secret of El Dorado about ten years ago.   I started by burning piles of tree limbs and then putting out the fires to create charcoal, which worked but wasn't an ideal way to make bio char.

Then, I discovered the TLUD (top lit up draft) method of making bio char, and I was able to make a higher quality bio-char in a more efficient way.  The pie-in-the-sky plan is that by using a TLUD, I can scale the process up and eventually have a small field of terra preta instead of just a large garden of terra preta. 

To start, I found a 55 gal barrel with a removable lid (pull out the plastic sealer around the inside of the lid or it will smoke like a son-of-a-gun until it burns away).
The next thing I did was drill a bunch of 3/8" holes in the bottom.  After I drilled the holes, I drove a tapered punch into each hole to flare them inward so it looked like a barrel with a bunch of bullet holes.   Besides making it look like I had shot all those holes by practicing my quick draw, I thought it might stiffen up the bottom and keep the bottom from warping or burning out as quick.
After I found another lid and a piece of 8" diameter stovepipe about 4 foot long, I started making my chimney by plopping the stove pipe on top of the lid and marking out an eight inch circle before using a grinder with a cut-off wheel to make eight pie cuts.   Make sure to cut a little past the 8" diameter circle (I'll explain later)
After bending those cuts up (it might take a few times bending them and unbending them to get the pipe to fit right), the chimney can be screwed to a few of the sharp-pointy-bent-up parts.  Those eight little slits are needed to feed air to the chimney to get the afterburner effect when you actually start making bio-char with this thing so don't forget to include them.
   
Besides a few bricks to put the barrel on if you want to get all fancy or a few sticks to put the barrel on if you want to go all minimalist with your design, that's basically all here is to making my version of a TLUD. 

When it comes time to make some bio-char, I put the barrel on three bricks or sticks, fill it up with wood, light a fire on top, and put the chimney on.  It smokes a little at first, then flames start up the chimney, and it roars to life for about an hour.   After about an hour of so, the chimney is taken off, the air is blocked off by throwing dirt all around the bottom, and the lid is put back on tight (I usually throw some concrete blocks on top of the lid to make sure it is tight). 

The next day, I end up with some more bio-char to add to the garden.  A little muss and no fuss, and I'm on my way to creating some terra preta that will last for hundreds or thousands of years. 

Next time, I'll show the actual burn process.

Hello, I'm Rich

Hello, I'm Rich

It always makes me laugh when I say "Hi, I'm Rich" because back when I was a teenager, I was working at a restaurant, and one day the manager came in and told me that there was a new girl that I needed to train.  So, I walked over to this new girl (who wasn't that hard to look at), and loudly proclaimed "Hi, I'm Rich".  She looked at me kind of funny, then about a dozen of my co-workers started laughing out loud because it sounded like I had unsuccessfully tried to use the world's worst pickup line.

I've read a number of blogs for a number of years, commenting frequently on a few, and thanks to one blogger that goes by the name Ron who said he would be interested in reading a blog about my world, I decided to finally try to give him and others a glimpse into that world.

Typically a story starts with a logical starting point, or a beginning that methodically explains the main characters, but I've decided to just jump right in with what I'm doing right now and hope that everyone that's interested can eventually follow what is going on (after all, if you met me in person you'd have to do the same thing).

My quick and dirty background is that I live in Oklahoma and make my living on a small farm raising cattle and growing small grains like wheat and grain sorghum, so most of this blog will be about the farm along with some deer hunting, gardening, bio-char, and everything else I'm interested at the time.

So, if you don't like cattle, farming, tractors, deer hunting, gardening, little bulldozers, muddy trucks, chainsaws, bio-char, or welding then this blog might not be for you.   If you are interested in some of that stuff then you might be able to tolerate this blog (I'm not making any promises though).